Car diagnostic tools information by obd2tool

Aller au contenu | Aller au menu | Aller à la recherche

vendredi, novembre 17 2023

Unveiling the Power of Heavy Duty Truck Scanner Tools: Everything You Need to Know

In today's rapidly advancing world of heavy-duty truck diagnostics, the role of specialized scanner tools has become increasingly crucial. These high-tech devices not only assist in identifying and rectifying issues efficiently but also play a significant role in ensuring compliance with modern emission standards. In this comprehensive blog post, we will delve into the world of heavy duty truck scanner tools, specifically focusing on electronic CAT, Mercedes Star Diagnostic Tool, John Deere Service Advisor EDL, and BMW Diagnostic Scanner. So fasten your seatbelts, and let's embark on this enlightening journey!

https://www.obd2tool.com/category-39-b0-Heavy+Duty+Diagnostic+Tools.html

I. Understanding the Significance of Heavy Duty Truck Scanner Tools: A. Enhancing Efficiency and Performance:

  1. How heavy duty truck scanner tools optimize vehicle performance.
  2. The benefits of identifying and resolving issues in real-time.

B. Complying with Emission Standards:

  1. How scanner tools aid in meeting stringent emission regulations.
  2. The role of diagnostic tools in reducing environmental impact.

II. Electronic CAT: Revolutionizing Truck Diagnostics: A. Introduction to Electronic CAT:

  1. Exploring the features and capabilities of electronic CAT scanners.
  2. Why electronic CAT is a preferred choice for heavy-duty truck technicians.

B. Key Features and Functions:

  1. Understanding the functionalities of electronic CAT scanners.
  2. How it assists in diagnosing and troubleshooting complex issues.

III. Mercedes Star Diagnostic Tool: Unleashing the Power of German Engineering: A. An Introduction to Mercedes Star Diagnostic Tool:

  1. Highlighting the unique characteristics of Mercedes Star Diagnostic Tool.
  2. The advantages of using this tool for Mercedes heavy-duty trucks.

B. Advanced Features and Capabilities:

  1. Exploring the cutting-edge functionalities of Mercedes Star Diagnostic Tool.
  2. How it aids in maintaining optimal performance and reliability.

IV. John Deere Service Advisor EDL: Empowering Agricultural Machinery: A. The Role of John Deere Service Advisor EDL:

  1. Understanding the significance of this tool in the farming industry.
  2. How it assists in maximizing productivity and minimizing downtime.

B. Comprehensive Diagnostic Solutions:

  1. Exploring the features and diagnostic capabilities of John Deere Service Advisor EDL.
  2. The benefits of using this tool for John Deere heavy-duty machinery.

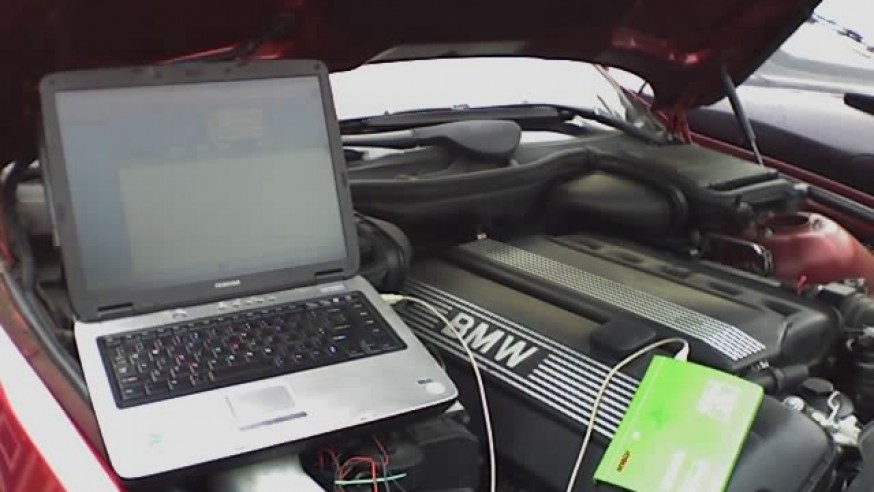
V. BMW Diagnostic Scanner: Unveiling the Secrets of German Automotive Engineering: A. Introduction to BMW Diagnostic Scanner:

  1. Discovering the unique features of BMW Diagnostic Scanner.
  2. How it assists in maintaining and optimizing BMW heavy-duty vehicles.

B. Advanced Diagnostic Functionalities:

  1. Exploring the powerful functionalities of BMW Diagnostic Scanner.
  2. The advantages of using this tool for BMW heavy-duty truck diagnostics.

As heavy-duty trucks continue to evolve, the importance of efficient and accurate diagnostics becomes paramount. Heavy duty truck scanner tools such as electronic CAT, Mercedes Star Diagnostic Tool, John Deere Service Advisor EDL, and BMW Diagnostic Scanner play a pivotal role in maximizing truck performance, meeting emission standards, and minimizing downtime. By investing in these cutting-edge tools, truck owners and technicians can ensure the longevity, reliability, and compliance of their heavy-duty fleet. So, embrace the power of technology and equip yourself with the right scanner tool for unrivaled truck diagnostics!

mercredi, novembre 8 2023

How to Diagnose a Coolant Temperature Sensor Problem?

A well-functioning coolant temperature sensor is crucial for the proper operation of a vehicle's engine. It continuously measures the temperature of the engine coolant and provides this information to the engine control unit (ECU). This data is utilized by the ECU to make real-time adjustments to the fuel mixture and ignition timing, ensuring optimal engine performance. However, if the coolant temperature sensor malfunctions, it can lead to various issues such as poor fuel efficiency, engine overheating, or even engine damage. In this blog post, we will discuss the steps involved in diagnosing a coolant temperature sensor problem and how to address it effectively.

https://www.obd2tool.com/goods-6833-JPRO+Professional+Diagnostic+Tool.html

Step 1: Identifying Symptoms

The initial step in diagnosing a coolant temperature sensor problem is to identify any symptoms that may indicate its malfunction. Some common signs include:

1. Fluctuating temperature gauge: If the temperature gauge on your dashboard shows inconsistent readings or jumps to high or low temperatures abruptly, it could indicate a faulty coolant temperature sensor.

2. Engine overheating: An overheating engine is a clear indication of a cooling system problem. While it can have multiple causes, a malfunctioning coolant temperature sensor is one of them.

3. Poor fuel efficiency: If you notice a sudden decrease in fuel efficiency or experience frequent stalling, it may be due to incorrect data from the coolant temperature sensor causing improper fuel delivery.

Step 2: Visual Inspection

Once you suspect a coolant temperature sensor problem based on the symptoms, it is important to visually inspect the sensor and its wiring for any visible damage. Look for signs of corrosion, loose connections, or wire fraying. These visual cues can help determine if a faulty sensor is the cause of the problem.

Step 3: Testing the Sensor

To accurately diagnose the coolant temperature sensor, you will need an OBD-II scan tool or a multimeter. Follow these steps to test the sensor:

1. Locate the coolant temperature sensor: Refer to your vehicle's repair manual to find the exact location of the coolant temperature sensor. It is typically mounted on the engine block, cylinder head, or radiator.

2. Disconnect the sensor: Carefully disconnect the electrical connector from the sensor.

3. Measure the resistance: Set your multimeter to the resistance mode and connect its probes to the sensor's terminals. Compare the measured resistance with the specifications provided in your vehicle's repair manual. If the resistance reading is significantly different or infinite, the sensor is likely faulty and needs replacement.

4. Scan for error codes: If you have an OBD-II scan tool, connect it to the vehicle's OBD-II port and retrieve any error codes related to the coolant temperature sensor. These codes can provide additional information and help pinpoint the issue.

Step 4: Replacement and Repair

If the visual inspection and sensor testing confirm a faulty coolant temperature sensor, it is time to replace it. Here's how you can do it:

1. Purchase a replacement sensor: Consult your vehicle's repair manual or contact a reputable auto parts store to find the correct replacement sensor for your vehicle.

2. Disconnect the battery: Before proceeding with any repairs, disconnect the negative terminal of the vehicle's battery to prevent electrical mishaps.

3. Remove the old sensor: Use the appropriate tools to carefully remove the old coolant temperature sensor from its mounting location. Be cautious not to damage any surrounding components.

4. Install the new sensor: Install the new sensor in the correct orientation and tighten it securely.

5. Reconnect the electrical connector: Ensure a proper connection by securely attaching the electrical connector to the new sensor.

6. Reconnect the battery: Reconnect the negative terminal of the battery and start the vehicle to ensure the new sensor is functioning correctly.

Diagnosing a coolant temperature sensor problem requires a systematic approach and the use of appropriate tools. By identifying symptoms, visually inspecting the sensor, testing its resistance, and scanning for error codes, you can determine if the sensor is faulty and needs replacement. Remember to consult your vehicle's repair manual for specific instructions and specifications. By addressing coolant temperature sensor issues promptly, you can ensure the optimal performance and longevity of your vehicle's engine.

mercredi, novembre 1 2023

Enhancing Efficiency with JPRO International MaxxForce EPA10 Highway and Cruise Speed Programming

In today's fast-paced world, efficiency is key for any business, especially in the transportation industry. To optimize performance and maximize fuel economy, fleet owners and operators rely on advanced diagnostic tools and programming solutions. Among the top choices is the JPRO International MaxxForce EPA10 Highway and Cruise Speed Programming. In this blog post, we will explore the features and benefits of this innovative tool, empowering you to make informed decisions for your fleet.

Understanding JPRO International MaxxForce EPA10: The JPRO International MaxxForce EPA10 is a powerful diagnostic adapter designed specifically for the MaxxForce engines in heavy-duty vehicles. It offers comprehensive diagnostic capabilities, allowing fleet managers to efficiently troubleshoot and resolve any potential issues. However, one of the standout features of this tool is the Highway and Cruise Speed Programming functionality.

https://www.obd2tool.com/category-227-b0-JPRO+Professional+Diagnostic+Tool.html

1. Increased Efficiency: By utilizing the JPRO International MaxxForce EPA10 Highway and Cruise Speed Programming, fleet operators can optimize the performance of their vehicles. This programming feature enables the adjustment of highway and cruise speeds, aligning them with specific business requirements and regulations. Fine-tuning these settings can lead to improved fuel efficiency, reducing costs and environmental impact simultaneously.

2. Customizable Speed Settings: The JPRO International MaxxForce EPA10 Highway and Cruise Speed Programming tool offers flexibility in setting speed limits on highways and during cruise control. This adaptability allows fleet managers to tailor their vehicles' performance to match the demands of various routes and terrains. By controlling speed parameters, fleet operators can ensure drivers comply with safety regulations while maintaining optimal efficiency.

3. Enhanced Safety and Compliance: Maintaining safety standards is a top priority in the transportation industry. With JPRO International MaxxForce EPA10's Highway and Cruise Speed Programming, fleet managers can establish speed limits that align with legal requirements, ensuring compliance with traffic regulations. By accurately monitoring and controlling vehicle speeds, operators can minimize the risk of accidents and potential legal complications.

4. User-Friendly Interface: The JPRO International MaxxForce EPA10 Highway and Cruise Speed Programming tool boasts a user-friendly interface, making it easy for fleet managers to navigate and utilize its features effectively. The intuitive design ensures a hassle-free experience, allowing users to modify speed settings efficiently and without requiring extensive technical knowledge.

Conclusion: Incorporating the JPRO International MaxxForce EPA10 Highway and Cruise Speed Programming tool into your fleet management strategy can significantly enhance efficiency, reduce costs, and ensure compliance with safety regulations. By fine-tuning speed settings to match specific business requirements, fleet operators can optimize fuel economy while maintaining the utmost safety standards.

Investing in advanced diagnostic tools and programming solutions like JPRO International MaxxForce EPA10 is a prudent decision for any fleet owner or operator aiming to stay ahead in the competitive transportation industry. Embrace this innovative technology to streamline your operations, bolster your bottom line, and contribute to a greener future.

Remember, the JPRO International MaxxForce EPA10 Highway and Cruise Speed Programming tool is just one of many exceptional options available in the market. Explore various diagnostic adapters and programming software, such as Mercedes Star Diagnostic Tool, Volvo Vocom Adapter, BMW ICOM, CAT Caterpillar ET Diagnostic Adapter, CNH EST Software, and John Deere Service Advisor EDL, to find the perfect fit for your fleet's needs.

jeudi, octobre 26 2023

Which Car Diagnostic Tool Should I Choose?

Are you tired of taking your car to the mechanic every time it has a problem? Do you want to save money and time by diagnosing and fixing issues yourself? If your answer is yes, then you need a reliable and efficient car diagnostic tool. With so many options available in the market, it can be overwhelming to choose the right one. In this blog post, we will discuss some popular car diagnostic tools and help you decide which one is best for you.

1. Caterpillar ET3 Adapter III: If you own a Caterpillar vehicle, then the Caterpillar ET3 Adapter III is a must-have diagnostic tool for you. It is specifically designed to diagnose and service Caterpillar engines and machinery. With its advanced features and user-friendly interface, this tool allows you to read and clear fault codes, perform system tests, and access real-time data. The Caterpillar ET3 Adapter III is a reliable choice for Caterpillar vehicle owners.

https://www.obd2tool.com/category-223-b0-CAT+Caterpillar+ET+Diagnostic+Adapter.html

2. CNH DPA5 Kit Diagnostic Tool: For those who own CNH (Case New Holland) vehicles, the CNH DPA5 Kit Diagnostic Tool is the perfect tool. This versatile diagnostic tool is compatible with a wide range of CNH equipment and can diagnose and troubleshoot various systems, including engine, transmission, brakes, and more. With its durable construction and easy-to-use software, the CNH DPA5 Kit Diagnostic Tool is an excellent investment for CNH vehicle owners.

3. John Deere Service Advisor EDL: If you own a John Deere vehicle, the John Deere Service Advisor EDL is the go-to diagnostic tool. It is designed to diagnose and service John Deere engines and equipment. With its comprehensive diagnostic capabilities, this tool can identify and resolve issues quickly and efficiently. The John Deere Service Advisor EDL is a trusted tool among John Deere vehicle owners and is known for its accuracy and reliability.

4. JPRO Heavy Truck Diagnostic Scanner: For heavy truck owners, the JPRO Heavy Truck Diagnostic Scanner is a top choice. This powerful tool is compatible with various heavy-duty truck brands and offers extensive diagnostic capabilities. From reading and clearing fault codes to performing advanced tests and calibrations, the JPRO Heavy Truck Diagnostic Scanner has it all. Its user-friendly interface and robust features make it an ideal tool for heavy truck owners.

5. Mercedes Star Diagnostic Tool: If you own a Mercedes-Benz vehicle, the Mercedes Star Diagnostic Tool is a must-have. This professional-grade tool allows you to access and diagnose various systems in your Mercedes-Benz, including engine, transmission, ABS, airbags, and more. With its advanced features and extensive vehicle coverage, the Mercedes Star Diagnostic Tool is a reliable choice for Mercedes-Benz owners.

6. Volvo Vocom Adapter: For Volvo vehicle owners, the Volvo Vocom Adapter is an essential diagnostic tool. It offers comprehensive diagnostic capabilities for Volvo trucks, buses, and construction equipment. With its intuitive software and user-friendly interface, the Volvo Vocom Adapter allows you to diagnose and troubleshoot various systems, saving you time and money on repairs.

7. BMW ICOM: If you own a BMW vehicle, the BMW ICOM is the go-to diagnostic tool. It is designed to diagnose and service BMW vehicles, including BMW cars, motorcycles, and Mini Cooper. With its advanced features and extensive vehicle coverage, the BMW ICOM is a reliable tool for BMW owners. It allows you to read and clear fault codes, perform coding and programming, and access real-time data.

In conclusion, choosing the right car diagnostic tool depends on the vehicle brand you own and your specific needs. Whether you own a Caterpillar, CNH, John Deere, Mercedes-Benz, Volvo, or BMW vehicle, there is a diagnostic tool available for you. Consider the features, compatibility, and customer reviews before making your decision. Investing in a reliable and efficient car diagnostic tool will not only save you money but also empower you to diagnose and fix issues yourself. So, take control of your car's health and choose the right diagnostic tool today!

mercredi, octobre 18 2023

Choosing the Right Diagnostic Tools for Efficient Machinery Maintenance

In today's fast-paced world, the agriculture industry heavily relies on advanced machinery and equipment for increased productivity and efficiency. Among these innovative machines, the New Holland CX8080 Combine takes center stage. However, like any other complex machinery, regular maintenance and diagnostic procedures are crucial to ensure optimal performance. In this blog post, we will focus on the installation procedure for the New Holland CX8080 Combine Variator Rotating Coupler, while also discussing the importance of utilizing cutting-edge diagnostic tools, such as the CNH EST Software, John Deere Service Advisor EDL, JPRO Heavy Truck Diagnostic Scanner, Volvo Vocom Adapter, and Cat Caterpillar ET Diagnostic Adapter.

https://www.obd2tool.com/category-233-b0-New+Holland+Electronic+Service+Tools.html

1. New Holland CX8080 Combine Variator Rotating Coupler Installation Procedure: The Variator Rotating Coupler is a vital component of the New Holland CX8080 Combine, responsible for ensuring smooth and efficient operation. Here is a step-by-step guide for its installation:

Step 1: Gather the necessary tools and equipment, including a torque wrench, socket set, and safety gloves. Step 2: Ensure the combine is parked on a level surface and power is fully disconnected. Step 3: Locate the existing variator rotating coupler and carefully remove it using the appropriate tools. Step 4: Inspect the new variator rotating coupler for any damages or defects before installation. Step 5: Align the new coupler with the appropriate position, ensuring a snug fit. Step 6: Use the torque wrench to tighten the coupler bolts to the manufacturer's specifications. Step 7: Double-check the installation to ensure proper alignment and tightness. Step 8: Reconnect the power and conduct a test run to ensure the coupler is functioning smoothly.

2. CNH EST Software: The CNH EST Software is an essential tool for diagnosing and maintaining New Holland agricultural machinery. It offers a wide range of features, including fault code reading, troubleshooting, and parameter adjustments. With its user-friendly interface, even novice technicians can easily navigate through the software, saving time and minimizing downtime.

3. John Deere Service Advisor EDL: Similar to the CNH EST Software, the John Deere Service Advisor EDL is specifically designed for John Deere equipment. This powerful diagnostic tool enables technicians to perform advanced diagnostics, view live data, and access service manuals, all of which contribute to efficient machinery maintenance. The EDL also provides valuable insights into potential issues, allowing for timely repairs and preventing costly breakdowns.

4. JPRO Heavy Truck Diagnostic Scanner: While primarily known for its heavy-duty truck diagnostic capabilities, the JPRO scanner can also be used for agricultural machinery. Its comprehensive coverage and advanced features make it an excellent choice for diagnosing complex systems, including the New Holland CX8080 Combine. The JPRO scanner simplifies the diagnostic process, providing technicians with accurate information to identify and resolve issues quickly.

5. Volvo Vocom Adapter: For those working with Volvo agricultural machinery, the Volvo Vocom Adapter is an indispensable tool. It offers a wide range of diagnostic functions, including reading and clearing fault codes, programming, and parameter adjustments. With its robust design and compatibility with various Volvo models, the Vocom Adapter ensures efficient maintenance and increased machinery uptime.

6. Cat Caterpillar ET Diagnostic Adapter: Caterpillar machinery requires precise diagnostic tools, and the Cat Caterpillar ET Diagnostic Adapter fulfills this requirement. This adapter allows technicians to perform comprehensive diagnostics, monitor real-time data, and access service manuals. With its extensive functionality, the Cat ET Adapter plays a vital role in maintaining and troubleshooting Cat agricultural machinery.

In the ever-evolving world of agriculture, efficient machinery maintenance is crucial for optimal productivity. By following the New Holland CX8080 Combine Variator Rotating Coupler installation procedure and utilizing cutting-edge diagnostic tools like the CNH EST Software, John Deere Service Advisor EDL, JPRO Heavy Truck Diagnostic Scanner, Volvo Vocom Adapter, and Cat Caterpillar ET Diagnostic Adapter, technicians can ensure smooth operations and quickly address any potential issues. Embracing technology and staying up-to-date with diagnostic tools will undoubtedly lead to increased efficiency and reduced downtime for agricultural machinery.

mardi, octobre 10 2023

Porsche PIWIS Tester No VCI has been Detected: The Ultimate Solution

Welcome Porsche enthusiasts! If you've encountered the frustrating error message stating "Porsche PIWIS Tester No VCI has been detected," you're not alone. This blog post aims to provide you with the ultimate solution to overcome this issue and get your Porsche diagnostic tool up and running smoothly. Whether you're a professional mechanic or a passionate car owner, we've got you covered!

Understanding the Problem: The porsche obd2 scanner, an advanced OBD2 scanner, is an indispensable tool for diagnosing and troubleshooting Porsche vehicles. However, encountering the "No VCI has been detected" error can halt your diagnostic process and hinder your ability to address potential issues effectively. But fear not, we have the perfect solution for you!

https://www.obd2tool.com/category-213-b0-Porsche+Diagnostic+Tools.html

The Importance of a Reliable Diagnostic Tool: Before we delve into the solution, let's emphasize the significance of investing in a high-quality diagnostic tool. A reliable scanner is essential to access accurate data, perform in-depth vehicle scans, and ensure prompt repairs. Brands like Porsche, Jaguar, Land Rover, BMW, and heavy-duty trucks require specific diagnostic software for seamless functionality, making it crucial to choose the right tools for efficient troubleshooting.

The Ultimate Solution: To overcome the "No VCI has been detected" error, follow these steps diligently:

1. Check Physical Connections: Ensure that all cables and connections between the PIWIS tester and the vehicle's OBD2 port are securely and correctly attached. Any loose or damaged connections can prevent the VCI from being detected.

2. Update Firmware and Software: Regularly updating the firmware and software of your diagnostic tool is essential for compatibility with the latest Porsche models and software versions. Visit the manufacturer's website or contact their customer support for the latest updates.

3. Power Cycle the System: Disconnect the PIWIS tester from the vehicle's OBD2 port and power it off. Wait for a few minutes before reconnecting and powering it back on. This simple power cycle can resolve any temporary glitches and refresh the communication between the VCI and the scanner.

4. Verify VCI Driver Installation: Ensure that the necessary VCI drivers are correctly installed on your computer or laptop. Visit the official website of the diagnostic tool manufacturer to download the latest drivers compatible with your operating system.

5. Inspect VCI Hardware: If the above steps do not resolve the issue, carefully examine the VCI hardware for any signs of damage or malfunction. In such cases, contacting the manufacturer's customer support or authorized service center is recommended for further assistance.

By following these steps, you can overcome the frustrating "Porsche PIWIS Tester No VCI has been detected" error and get back on track with your Porsche diagnostics. Remember, investing in a reliable and up-to-date diagnostic tool is crucial for accurate and efficient troubleshooting. With the right tools in hand, you'll be able to maintain and repair your beloved Porsche with ease, ensuring optimal performance and longevity.

Now, go ahead and conquer those diagnostic challenges, unleash your ardour for Porsche, and enjoy the thrill of seamless troubleshooting!

vendredi, septembre 29 2023

Unveiling the Circuit Diagram of Mercedes Diagnostic Tool Software: A Comprehensive Guide

Welcome to our blog post dedicated to exploring the intricate world of Mercedes diagnostic tool software. In this guide, we will uncover how to view the circuit diagram of this powerful software, which is also applicable to other renowned automotive brands such as Jaguar Land Rover, heavy-duty trucks, Porsche, and BMW. Whether you are a passionate car enthusiast, a professional mechanic, or just curious about the inner workings of these cutting-edge tools, this article will provide you with valuable insights. So, let's dive right in!

Section 1: Understanding the Importance of Circuit Diagrams in Diagnostic Tools 1.1 The role of circuit diagrams in automotive diagnostics 1.2 Why understanding circuit diagrams is crucial for effective troubleshooting 1.3 How circuit diagrams facilitate accurate diagnosis

https://www.obd2tool.com/category-163-b0-MB+Star+Diagnostic+Tools.html

Section 2: Exploring Mercedes Diagnostic Tool Software 2.1 Overview of Mercedes diagnostic tool software 2.2 Key features and functionalities 2.3 Benefits of using Mercedes diagnostic tools for vehicle maintenance 2.4 Compatibility with other automotive brands

Section 3: Unveiling the Circuit Diagram 3.1 Accessing the circuit diagram within the software interface 3.2 Navigating the circuit diagram for a specific vehicle model 3.3 Understanding the components and connections within the diagram 3.4 Interpreting symbols and notations in the circuit diagram

Section 4: Enhancing Diagnostic Capabilities with Additional Tools 4.1 Integration of Jaguar Land Rover, heavy-duty truck, Porsche, and BMW diagnostic software 4.2 Exploring advanced features and options for in-depth analysis 4.3 Expanding compatibility and functionality through software updates

Section 5: Tips for Effective Use and Troubleshooting 5.1 Best practices for utilizing circuit diagrams during diagnostics 5.2 Troubleshooting common issues in Mercedes diagnostic tool software 5.3 Maximizing the potential of the software for accurate and efficient repairs

In conclusion, understanding the circuit diagram of Mercedes diagnostic tool software, as well as its application to other automotive brands, is essential for efficient troubleshooting and accurate diagnosis. By delving into the circuit diagram, you gain valuable insights into the intricate connections and components of the vehicle's electrical system, enabling you to identify and rectify issues effectively. Remember to stay updated with the latest software versions and follow best practices to enhance your diagnostic capabilities. With ardour and dedication, you can become a master at utilizing these advanced tools, providing top-notch maintenance and repair services for Mercedes, Jaguar Land Rover, heavy-duty trucks, Porsche, and BMW vehicles.

We hope this comprehensive guide has helped shed light on the process of viewing circuit diagrams within Mercedes diagnostic tool software. Start exploring the world of automotive diagnostics today and unlock endless possibilities for maintaining and repairing these high-performance vehicles.

mercredi, septembre 20 2023

DOIP VCI: Essential Diagnostic Tool

In the ever-evolving world of automotive technology, diagnostics play a crucial role in identifying and resolving issues within vehicles. With the advent of the Diagnostic Over Internet Protocol (DOIP) Vehicle Communication Interface (VCI), automotive manufacturers have been able to streamline their diagnostic processes effectively. In this blog post, we will delve into the details of DOIP VCI, particularly its applications in Mercedes-Benz, Porsche, BMW, and truck diagnostics.

What is DOIP VCI? DOIP VCI, also known as Diagnostic Over Internet Protocol Vehicle Communication Interface, is a cutting-edge technology that allows technicians to communicate with a vehicle's onboard systems for diagnostic purposes. It facilitates the exchange of crucial data between the vehicle and diagnostic equipment, enabling comprehensive analysis and troubleshooting.

https://www.obd2tool.com/category-209-b0-JLR+VCI.html

DOIP VCI in Star Mercedes: Star Mercedes, the renowned luxury car brand, has embraced DOIP VCI as an integral part of their diagnostic system. By utilizing this technology, Mercedes technicians can access real-time data from various vehicle modules, including engine control units, transmission systems, ABS, airbags, and more. This enables them to accurately diagnose and address any issues, ensuring optimal performance and safety.

Porsche Diagnostic Tool: Porsche, synonymous with high-performance sports cars, also utilizes DOIP VCI for their diagnostic needs. The Porsche Diagnostic Tool, integrated with DOIP VCI, provides technicians with comprehensive access to the vehicle's systems. This allows for seamless diagnostics, coding, programming, and other advanced functionalities. By leveraging DOIP VCI, Porsche ensures that their vehicles are maintained at peak performance levels.

BMW OBD Software:

BMW, a prestigious brand known for luxury and innovation, has integrated DOIP VCI technology into their OBD software. This software, in conjunction with DOIP VCI, offers enhanced diagnostic capabilities for BMW vehicles. Technicians can access detailed information on various systems, perform coding and programming, and efficiently diagnose complex issues. This integration showcases BMW's commitment to delivering exceptional performance and reliability.

Truck Diagnostic Scan Tool: Truck diagnostics are equally important, and DOIP VCI has made significant strides in this domain as well. Truck diagnostic scan tools, equipped with DOIP VCI, provide technicians with in-depth insights into heavy-duty vehicle systems. From engine diagnostics to ABS, emissions, and more, these tools ensure efficient troubleshooting and maintenance, minimizing downtime and maximizing productivity.

DOIP VCI has revolutionized the diagnostics landscape, offering seamless communication between vehicles and diagnostic equipment. Its integration in the diagnostic systems of renowned brands like Mercedes-Benz, Porsche, BMW, and the trucking industry showcases its versatility and reliability. With DOIP VCI, technicians can access real-time data, diagnose complex issues, and ensure optimal performance for a wide range of vehicles. As automotive technology continues to advance, DOIP VCI will undoubtedly play a pivotal role in driving efficiency and accuracy in diagnostics.

A Comprehensive Guide on Setting Up a Heavy Duty Truck Diagnostic Scanner

Welcome to our blog, where we will guide you through the process of setting up a heavy-duty truck diagnostic scanner. In today's technologically advanced world, it is crucial for mechanics and truck owners to have the right tools to efficiently diagnose and repair heavy-duty vehicles. One such tool is a heavy-duty truck diagnostic scanner, which can help identify and troubleshoot various issues in your truck. In this article, we will discuss the steps involved in setting up a heavy-duty truck diagnostic scanner, along with some popular brands and models available in the market.

I. Understanding the Importance of a Heavy Duty Truck Diagnostic Scanner: Before diving into the setup process, let's briefly highlight why investing in a heavy-duty truck diagnostic scanner is essential. These scanners are designed to read and interpret the truck's onboard computer system, enabling mechanics to identify potential problems accurately. By diagnosing issues early on, you can save time, money, and prevent major breakdowns. A reliable heavy-duty truck diagnostic scanner is a valuable asset for any truck owner or mechanic.

II. Selecting the Right Heavy Duty Truck Diagnostic Scanner: 1. Research Popular Brands: BMW, Mercedes, and Porsche are renowned automobile manufacturers that offer high-quality diagnostic tools. Research different brands and models to find one that meets your specific requirements. 2. Consider Compatibility: Ensure that the diagnostic scanner you choose is compatible with heavy-duty trucks. Some scanners may only work with specific truck models or manufacturers. 3. Features and Functions: Look for scanners that offer a wide range of functions, including reading and clearing fault codes, displaying live data, performing system tests, and programming various truck components.

III. Setting Up Your Heavy Duty Truck Diagnostic Scanner: 1. Read the User Manual: Carefully go through the user manual provided with your diagnostic scanner. Familiarize yourself with the scanner's features, buttons, and navigation system. 2. Connect the Scanner: Locate the diagnostic port in your heavy-duty truck, typically located under the dashboard or near the steering wheel. Connect the scanner's OBD-II cable to the truck's diagnostic port securely. 3. Power On: Turn on the scanner and wait for it to boot up. Follow the on-screen instructions to set the preferred language, date, and time. 4. Establish Communication: Once the scanner is powered on, it will establish communication with the truck's computer system. This process may take a few moments. 5. Select Truck Make and Model: Use the scanner's navigation buttons to select the appropriate truck make and model. This step ensures accurate data retrieval and compatibility. 6. Perform Diagnostics: Now that the scanner is connected and communication is established, you can start performing diagnostics. Follow the scanner's prompts to access various functions, such as reading fault codes, live data, or running system tests. 7. Interpret Results: Once the scanner completes the diagnostic process, it will display the results on its screen. Interpret the data carefully, noting any fault codes or abnormalities that require attention. 8. Troubleshooting and Repair: Based on the diagnostic results, you can proceed with troubleshooting and repairing the identified issues. Utilize the scanner's functions to clear fault codes, reset systems, or perform specific tasks as needed.

https://www.obd2tool.com/category-230-b0-BMW+ICOM.html

IV. Popular Heavy Duty Truck Diagnostic Scanners: 1. BMW Diagnostic Tool: BMW offers a range of diagnostic tools, such as the BMW ISTA and INPA software, designed specifically for their vehicles. These tools provide comprehensive diagnostics and programming capabilities. 2. JLR VCI: The JLR VCI (Vehicle Communication Interface) is a powerful diagnostic tool for Jaguar and Land Rover vehicles. It allows for in-depth diagnostics, module programming, and vehicle configuration. 3. STAR Mercedes: The STAR Mercedes diagnostic tool is widely used for Mercedes-Benz vehicles. It offers advanced diagnostics, coding, and programming functions, ensuring accurate and efficient repairs. 4. Porsche Diagnostic Tool: Porsche offers the Porsche PIWIS (Porsche Integrated Workshop Information System) diagnostic tool. It provides comprehensive diagnostics, coding, and programming features for Porsche vehicles.

Setting up a heavy-duty truck diagnostic scanner is a vital step in ensuring efficient and accurate truck repairs. By following the steps outlined in this guide, you can successfully set up your scanner and begin diagnosing and troubleshooting heavy-duty trucks. Remember to choose a reliable brand and model that suits your specific needs. Investing in a quality heavy-duty truck diagnostic scanner will prove invaluable in maintaining the performance and longevity of your heavy-duty truck.

vendredi, septembre 8 2023

Unveiling the Powerful Features and Benefits of JCB Electronic Interface

In the fast-paced world of heavy machinery and construction equipment, staying ahead of the game is crucial. JCB, a renowned leader in the industry, has consistently pushed boundaries with their innovative solutions. One such breakthrough is the JCB electronic interface, a cutting-edge tool that revolutionizes diagnostics and maintenance. In this blog post, we will explore the remarkable features and undeniable benefits of this technology, ensuring that you are well-informed about this game-changing solution.

1. Unmatched Versatility and Compatibility: The JCB electronic interface is designed to seamlessly integrate with a wide array of heavy machinery models, making it an invaluable asset for equipment owners. From JCB excavators and loaders to other machinery brands like Benz DoIP C6, WABCO DIAGNOSTIC KIT, witech Chrysler, and Tech 2, this interface delivers unmatched compatibility. This versatility eliminates the need for multiple diagnostic tools, saving time and money while maximizing efficiency.

https://www.obd2tool.com/goods-4451-JCB-Electronic-Service-Tool-JCB-Diagnostic-Interface.htmlJCB Electronic Service tool

2. Comprehensive Diagnostic Capabilities: Efficient diagnostics are vital for identifying and resolving equipment issues promptly, minimizing downtime, and optimizing productivity. The JCB electronic interface offers comprehensive diagnostic capabilities, allowing technicians to efficiently assess and troubleshoot machinery. This technology provides real-time data on engine performance, hydraulic systems, electrical components, and more, enabling swift and accurate diagnoses. Ultimately, this leads to faster repairs, reduced costs, and enhanced operational efficiency.

3. Advanced Fault Code Analysis: Troubleshooting complex machinery can be a daunting task, especially when it involves deciphering fault codes. The JCB electronic interface simplifies this process by providing advanced fault code analysis. Equipped with an extensive database of fault codes specific to various machinery models, the interface quickly identifies the root cause of issues. This feature not only saves valuable time but also ensures that repairs are effectively targeted, minimizing unnecessary part replacements and reducing maintenance costs.

4. Real-time Performance Monitoring: Monitoring the performance of heavy machinery is crucial for preventing potential breakdowns and optimizing lifespan. With the JCB electronic interface, real-time performance monitoring becomes a breeze. This technology provides live data on engine parameters, hydraulic pressures, temperatures, and more. By analyzing this data, operators and technicians can detect anomalies early on and take proactive measures, ensuring equipment operates at peak performance levels. This results in increased reliability, reduced downtime, and extended machinery lifespan.

5. Enhanced Software Updates and Support: Keeping up with the latest software updates is key to utilizing the full potential of any electronic interface. JCB understands this and provides comprehensive software support to ensure the interface remains up-to-date. Regular updates introduce new features, fix bugs, and enhance compatibility, guaranteeing optimal performance. Additionally, JCB's dedicated customer support team is readily available to address any queries or concerns, ensuring a seamless user experience.

The JCB electronic interface is a game-changer in the heavy machinery industry, combining versatility, comprehensive diagnostics, fault code analysis, real-time monitoring, and exceptional support. By investing in this advanced tool, equipment owners can streamline maintenance processes, reduce downtime, and maximize productivity. Embrace the power of the JCB electronic interface and stay ahead of the competition in the dynamic world of heavy machinery.

jeudi, août 31 2023

Indispensable Tools for Automotive Diagnostics: JPRO Diagnostic Tool and More

In the ever-evolving world of automotive diagnostics, having the right tools is crucial for mechanics and technicians. As technology advances, vehicles become more complex, making it essential to have reliable diagnostic tools to accurately identify and resolve issues. In this blog post, we will explore several indispensable tools that have revolutionized the automotive industry, namely the JPRO diagnostic tool, ICOM for BMW, Chrysler diagnostic software, VOCOM Volvo truck diagnostic tool, and Ford VCM 2.

1. JPRO Truck Diagnostics:

The JPRO diagnostic tool is a comprehensive solution specifically designed for diagnosing and repairing heavy-duty trucks. With its user-friendly interface, this tool allows technicians to quickly and accurately diagnose various systems, including engine, transmission, brakes, and more. JPRO offers extensive coverage for major truck brands, enabling mechanics to efficiently troubleshoot problems and reduce vehicle downtime. Its advanced features, such as bi-directional testing and parameter adjustments, make it an invaluable tool in any truck repair shop.

https://www.obd2tool.com/goods-6833-JPRO+Professional+Diagnostic+Tool.html

2. ICOM for BMW:

ICOM (Integrated Communication Optical Module) is a diagnostic and programming tool used exclusively for BMW vehicles. It provides technicians with unparalleled access to BMW's advanced diagnostic and programming capabilities. With ICOM, mechanics can seamlessly communicate with various control modules within a BMW, perform in-depth system scans, and carry out coding and programming tasks. This tool simplifies complex diagnostic procedures and ensures accurate and efficient repairs for BMW owners.

3. Chrysler Diagnostic Software:

Chrysler diagnostic software is a specialized tool for diagnosing and repairing Chrysler, Dodge, and Jeep vehicles. This software enables technicians to access the vehicle's onboard computer system and retrieve valuable diagnostic information. It provides comprehensive coverage for various systems, including engine, transmission, ABS, airbags, and more. With Chrysler diagnostic software, mechanics can perform system tests, read live data, and even reprogram modules, ensuring precise troubleshooting and effective repairs.

4. VOCOM Volvo Truck Diagnostic Tool:

The VOCOM diagnostic tool has become an essential tool for Volvo truck technicians worldwide. It offers comprehensive diagnostics for Volvo trucks and provides real-time data, fault code analysis, and component testing capabilities. VOCOM also allows technicians to perform parameter adjustments, calibrations, and programming tasks, ensuring accurate and efficient repairs. Its compatibility with multiple Volvo truck models makes it a valuable asset in any Volvo repair facility.

5. Ford VCM 2:

The Ford VCM 2 diagnostic tool is a powerful tool designed for diagnosing, programming, and configuring Ford vehicles. It provides technicians with access to Ford's advanced diagnostic capabilities, allowing them to perform system scans, read live data, and retrieve fault codes. With the Ford VCM 2, mechanics can also program modules, update software, and perform adaptations to ensure optimal vehicle performance. Its versatility and compatibility with a wide range of Ford models make it an indispensable tool in any Ford repair shop.

In the fast-paced world of automotive diagnostics, having the right tools can make all the difference in providing accurate and efficient repairs. The JPRO diagnostic tool, ICOM for BMW, Chrysler diagnostic software, VOCOM Volvo truck diagnostic tool, and Ford VCM 2 are indispensable tools for technicians in their respective fields. These tools have revolutionized the automotive industry by simplifying complex diagnostic procedures, enhancing accuracy, and reducing vehicle downtime. By embracing these advanced tools, automotive professionals can ensure reliable repairs and deliver exceptional service to their customers.

samedi, août 26 2023

How to Choose the Right Diagnostic Tool for Your Equipment

In today's technologically advanced world, having the right diagnostic tool is essential for ensuring the smooth operation of your equipment. With a wide range of options available in the market, it can be overwhelming to choose the right diagnostic tool that meets your specific needs. This blog post aims to guide you through the process of selecting the best diagnostic tool, focusing on the popular options such as Nexiq USB Link, Caterpillar ET3 Adapter III, CNH DPA 5 Diagnostic Kit, Best Cummins Diagnostic Tool, and John Deere Diagnostic Software.

https://www.obd2tool.com/category-232-b0-Nexiq+USB+Link.html

1. Identify Your Equipment and Diagnostic Requirements: The first step in choosing the right diagnostic tool is to clearly identify the equipment you need to diagnose. Different diagnostic tools are designed to work with specific equipment, so it is crucial to ensure compatibility. Additionally, consider the specific diagnostic capabilities you require, such as engine, transmission, or electrical system diagnostics.

2. Research and Compare: Once you have identified your equipment and diagnostic requirements, conduct thorough research on the available diagnostic tools in the market. Read product reviews, compare features, and consider factors such as ease of use, reliability, and customer support. Look for diagnostic tools that offer comprehensive coverage, allowing you to diagnose multiple systems or brands.

3. Consider Connectivity Options: The connectivity options offered by a diagnostic tool play a significant role in its usability and compatibility. USB, Bluetooth, and Wi-Fi are common connectivity options available. Consider your preferred connectivity method and ensure that the diagnostic tool supports it. For example, the Nexiq USB Link offers a reliable USB connection, while the Caterpillar ET3 Adapter III provides both USB and Bluetooth connectivity.

4. Evaluate Software Compatibility and Updates: Diagnostic tools are typically accompanied by software that enables communication with the equipment. Ensure that the diagnostic tool you choose is compatible with your computer operating system, as well as the specific software required. Additionally, consider the frequency and availability of software updates, as they are crucial for staying up-to-date with the latest diagnostic capabilities and resolving bugs.

5. Assess User-Friendliness and Technical Support: A user-friendly interface is essential for efficient diagnostics. Look for diagnostic tools that offer intuitive navigation and clear instructions. Additionally, consider the availability of technical support from the manufacturer or supplier. Prompt assistance can save you time and frustration when facing technical difficulties or requiring guidance.

6. Evaluate Cost and Return on Investment: While cost should not be the sole determining factor, it is important to consider your budget and evaluate the long-term return on investment. Compare prices, warranty options, and the overall value offered by the diagnostic tool. Remember that choosing a reliable and efficient diagnostic tool may save you significant costs in the long run by preventing equipment breakdowns and reducing maintenance expenses.

Choosing the right diagnostic tool for your equipment is crucial for efficient troubleshooting and maintenance. By following these guidelines and considering factors such as compatibility, features, connectivity options, software updates, user-friendliness, and cost, you can make an informed decision. Whether you opt for the Nexiq USB Link, Caterpillar ET3 Adapter III, CNH DPA 5 Diagnostic Kit, Best Cummins Diagnostic Tool, or John Deere Diagnostic Software, selecting the right diagnostic tool will enhance your equipment's performance and prolong its lifespan.

jeudi, août 17 2023

Powerful function of JPRO Heavy Duty Truck Diagnostic Scanner in car maintenance

In the world of heavy trucks, having the right diagnostic tools is essential for efficient and accurate troubleshooting. With so many options on the market, choosing the diagnostic tool that best suits your needs can be overwhelming. In this blog post, we discuss five of the top industry-recognized diagnostic tools: JPRO Heavy Duty Truck Diagnostic Scanner, Volvo Vocom Adapter, John Deere Service Advisor EDL, Cat Caterpillar ET Diagnostic Adapter, and CNH DPA5 Kit Diagnostic Tool.

1. JPRO Heavy Duty Truck Diagnostic Scanner: JPRO Heavy Truck Diagnostic Scanner is considered one of the best tools for finding and fixing problems with heavy trucks. It provides comprehensive diagnostics for various truck brands including Freightliner, Volvo, International, Peterbilt and more. With its user-friendly interface and extensive system module coverage, JPRO enables technicians to quickly identify problems and provide accurate solutions. Plus, it offers detailed fault code descriptions, real-time data readouts and advanced bi-directional controls, making it an indispensable tool for any heavy truck repair shop.

https://www.obd2tool.com/category-227-b0-JPRO+Professional+Diagnostic+Tool.html

2. Volvo Vocom Adapter: The Volvo Vocom adapter is a must-have diagnostic tool for those using Volvo trucks. The adapter offers a wide range of functions including diagnostics, programming and parameter setting. Compatible with Volvo trucks, buses and construction equipment, it provides technicians with valuable insight into vehicle systems. Vocom adapters are known for their reliability, ease of use, and ability to perform advanced tasks such as injector cutout testing and fuel system calibration. It is an essential tool for any Volvo Trucks service centre.

3. John Deere Service Advisor EDL: When it comes to heavy agricultural machinery, John Deere Service Advisor EDL stands out as the top diagnostic tool. Specifically designed for John Deere equipment, this tool enables technicians to efficiently diagnose and fix a variety of problems. With its user-friendly interface and extensive database of repair information, Service Advisor EDL can help troubleshoot engine, transmission, electrical and hydraulic systems. It also provides access to wiring diagrams, component location information, and step-by-step repair procedures, making it an invaluable resource for any John Deere service technician.

4. Cat Caterpillar ET Diagnostic Adapter: Caterpillar is a well-known name in the heavy equipment industry, and the Cat Caterpillar ET Diagnostic Adapter is the tool of choice for diagnosing Caterpillar engines and equipment. The adapter allows technicians to perform diagnostics, view and clear fault codes, monitor real-time data, and perform various tests on Caterpillar engines and systems. Cat ET Diagnostic Adapters combine powerful features and a user-friendly interface to provide accurate and efficient diagnostics, helping to save time and money. It is an indispensable tool for any Caterpillar service center.

5. CNH DPA5 kit diagnostic tools: The CNH DPA5 Kit Diagnostic Tool is an excellent choice for those using Case New Holland (CNH) equipment. The tool provides comprehensive diagnostic and programming capabilities for CNH machinery including tractors, combines and construction equipment. With an intuitive software interface and extensive coverage of CNH systems, the DPA5 suite enables technicians to quickly identify and resolve problems. It also provides a service manual, wiring diagrams and troubleshooting guides, making it an invaluable tool for any CNH service technician.

In conclusion, when looking for the best diagnostic tool for heavy trucks, it is important to consider the specific needs and requirements of your vehicle brand. JPRO Heavy Duty Truck Diagnostic Scanner, Volvo Vocom Adapter, John Deere Service Advisor EDL, Cat Caterpillar ET Diagnostic Adapter, and CNH DPA5 Kit Diagnostic Tools are all great choices for different truck makes and equipment. By investing in the right diagnostic tools, you can ensure efficient troubleshooting and timely repairs, ultimately improving the performance and reliability of your heavy-duty trucks.

vendredi, juillet 28 2023

Powerful function of BMW ICOM in Porsche vehicle maintenance

Powerful function of BMW ICOM in Porsche vehicle maintenance

When it comes to BMW vehicle diagnostics, choosing the right software is crucial for accurately identifying and fixing any issues that may arise. With the advancement of technology, there are now various options available in the market. In this blog post, we will discuss the key factors to consider when selecting the ideal diagnostic software for your BMW.

https://www.obd2tool.com/category-230-b0-BMW+ICOM.html

Compatibility: The first and foremost factor to consider is compatibility. Ensure that the software you choose is compatible with your BMW model and year. Different BMW models may have varying diagnostic requirements, so it's essential to select software that aligns with your specific vehicle.

Features: The diagnostic software you opt for should offer a comprehensive range of features to meet your diagnostic needs. Look for software that provides access to key subsystems, such as the engine, transmission, ABS, airbags, and more. It should also offer bi-directional control capability, which allows you to perform various functions like activating components, reading sensor data, and resetting adaptations.

User-friendly Interface: Choosing a diagnostic software with a user-friendly interface is essential, especially if you are not a professional mechanic. The software should be easy to navigate, with intuitive icons and clear instructions. This will make the diagnostic process much smoother and more accessible, saving you time and effort.

Updates and Support: Regular updates and technical support are essential for keeping your diagnostic software up-to-date with the latest BMW models and systems. Ensure that the software you choose offers regular updates and has reliable technical support available.

Diagnostic Tools: In addition to the software, you will also need compatible diagnostic tools to connect with your BMW vehicle. Make sure the software you select is compatible with the diagnostic tool you already own or plan to purchase. Some popular diagnostic tools for BMW include BMW ICOM, MB SD Connect C4, Porsche Piwis3 PT3G-VCI, and GM MDI 2.

Before making a final decision, it's a good idea to check reviews and recommendations from other BMW owners and experts. Look for feedback on the software's performance, ease of use, reliability, and customer support. This will give you a better understanding of the pros and cons of each software option.

Choosing the right diagnostic software is crucial for effectively diagnosing and resolving any issues with your BMW vehicle. By considering compatibility, features, user-friendliness, updates, support, and reviews, you can make an informed decision that meets your specific BMW diagnostic needs. So, take your time, research thoroughly, and select the best diagnostic software that will help you keep your BMW in top condition.

samedi, juillet 22 2023

Which Car Models Can Work with VOCOMII

Which Car Models Can Work with VOCOMII?

In the world of automotive diagnostics, having the right tools and equipment is crucial. One such tool that has gained popularity among technicians and car enthusiasts is the VOCOM II. But, which car models can actually work with this advanced diagnostic tool? Let's find out!

Using the right Volvo OBD2 scanner is almost magical. You get special access to some Volvo-only repair functions other generic scanners can’t offer. Moreover, they work seamlessly with Volvo cars, SUVs, and light trucks without any issues. However, choosing the right Volvo scan tool can be tricky since many diagnostic devices claim to support Volvo vehicles.

Vocom Communication Unit is designed with focus on robustness and durability to withstand the tough workshop environment: ·Improved LED indicators ·Improved quality of cables ·Military standard on connectors ·Better liquid and dust ingress protectors ·Metal casing and rubber bumbers for better robustness

Premium Tech Tool developer tool 1. Dealer tool to access and program parameters in Level2 and Level3 without connecting to central severs; 2. Works with Tech Tool (VCADs Pro), Normal or Development mode, support 28 languages; 3. Support all brands and models supported by Tech Tool (VCADs Pro); 4. Make programmable more than 11000 parameters. 5. Program speed limit, change chassis ID, disable immobilizer; 6. Change minimum/maximum values of parameters, for example: increase speed limit;

VOCOMII is a versatile and powerful diagnostic tool suitable for a range of car models. Its compatibility with Volvo cars, Mack Trucks, Renault Trucks, and UD Trucks makes it a valuable asset for mechanics and technicians looking to ensure the smooth operation of these vehicles. With VOCOMII, car owners and professionals can diagnose, troubleshoot, and maintain their vehicles with ease and precision, minimizing downtime and maximizing efficiency.

mercredi, février 16 2022

How to update Xhorse VVDI2 Professional Tool

The VVDI2 comes with Basic Function + VW + AUDI Generation 5 function+ BMW + BMW OBD Fucntion + BMW CAS4 + Porsche + Most Tango Functions + Part of J2534 Functions + MQB + Copy 48by OBDII + COPY 48 96BIT+ BMW FEM + Free pin, cs, mac authorization + English remote database

No need to buy any other authorizations

Update firmware steps are listed below:

1) Close other VVDI2 programs, connect VVDI2 to PC with USB cable

2) Choose VVDI2 firmware version from Firmware List

3) Press button Update Online, wait the progress end

4) If failed to get firmware list or get something like “communicate with server error!” while update your device, close antivirus and firewall programs, try again. Change your internet provider once failed again

5) DON’T shutdown your PC or disconnect USB cable while update device

How-to-update-Xhorse-VVDI2-Professional-Tool-2

A.You need to Refresh Firmware List Update Online Tool will connect to server automatically and download the newest firmware information. You can press flash picture button if there’s no display. After you get information success, will display current support firmware list, the software support by specify firmware and the mainly include update information

B.You need to confirm Device Information After connect VVDI2 to PC and install USB drivers, Press button Device Information, will show you VVDI2 Serial Number, current firmware version in VVDI2, authorize information etc.

C. You need to Update Online After connect VVDI2 to PC and install USB drivers, choose you expect firmware version from firmware list, Press button Update Online, wait progress finish (about 2 minutes) (This requires internet.)

VVDI2 Commander Key Programmer FAQs:

Q:I try to copy id48, but it says no authorization, please open it for me

A:The vvdi2 full has the id48 copy authorization, please update the software and firmware to the latest version, then try again.

Q:Is there only with 5th BDM without 5th coil ? A:Since 5th coil had been connected with VVDI unit, and difficult to connect BDM.So it is single one.

Q:What’s CAS Plus on VVDI2 ? A:It can be used to read EWS CAS1.2.3. The used CAS4,5th and 4th coil had been connected on VVDI2 unit

Q:Does VVDI2 support BMW CAS4+ keys ? A:Yes, it can

Q:Which kind of keys is programmed via OBD2 and which is via CAS ? A:Pls refer to BMW Multi Tool instructions ,since VVDI2 is with same function with BMW Multi Tool

Q:What’s the difference between VVDI2 and TM100 about key programming ? A:The key programming function and method of VVDI2 is similar with TM100. On the other words,VVDI2 include all TM100 function, and BMW,VAG series.

Q:Do we need to solder chips when using VVDI to do EWS , How about TM100? A:VVDI2 can not support EWS, but VVDI2,VVDIProg are related with EWS. If use VVDI2 with CAS Plus adapter and then can not tear some kind of chips

Q:Customer gave us feedback that can not understand the page,it is not English,not Russian.What is it? A:Currently about VVDI2 prepare remote function cannot support english database,only Chinese database.still developing this function.

Q:VVDI 2 shows “remaining synchronization time: 17 days”,what is it? A:It means after you activate it to use,it already use for 13 days.And when it comes to 0 days,you can connect with internet,it will automatically change to 30 days again. It connects to the server and synchronizes once every 31 days. This process is done automatically by itself for 1 day, internet connection is required for this process.

Q:When i do MED17 function,it shows need authorization for condor,what can i do?

A:It needs to bind with condor key cutting machine. The following function listed in Xhorse VVDI2 need internet support and require authorize for Condor Automatic key cutting machine: OBD read MED17/EDC17 PIN / CS / MAC, calculate OBD data online, calculate EEPROM / FLASH for PIN/MAC/CS.

2012 Benz E350 W212 Add New Smart Key by Autel IM508

Autel IM508 can add key, do all key lost, reset immobilizer, replace IMMO components (engine/immobilizer/for blade key) &(smart IMMO box/for smart key), Backup IMMO (smart key), delete key, and read live data/DTC for Mercedes-Benz E class. Here mainly share how to add a new keyless Go push start to Benz E350 W212.

Before entering the operation process, check the newest Autel IM508 Benz IMMO function list firstly. Functions Modes EIS type Supported EIS type Add key OBD/on bench EIS CAN-line) W164 -2008, W164 2009-, W166, W169, W172, W197, W204, W207, W209 2006-, W211, W212, W216, W218, W221, W246, W251 -2008, W251 2009-, W639/2009-, W906 EIS K-line) W202, W203, W208, W209, W210, W215(some supported), W220, W230, W463, W639 All key lost OBD 3rd CAN EIS W164 2009- , W169, W172, W204, W207, W209/2006-, W211, W216, W251/2009-, W639/2009-, W906(use with G-BOX 8 time faster) On bench 3rd Generation EIS: W164 -2008, W164/2009-, W169, W172, W204, W207, W209/2006-, W211, W216, W221, W251/2009-, W639/2009-, W906(use with G-BOX 8 time faster) On bench EIS(K-line) W202, W203, W208, W209, W210, W215, W220, W463, W639(use with G-BOX 8 time faster) IMMO part replacement OBD/on bench EIS replacement

(Read/write/erase) W164/-2008, W164/2009-, W166, W169, W172, W197, W204, W207, W209/2006-, W211, W212, W216, W218, W221, W246, W251/-2008, W251/2009-, W202(K), W203(K), W208(K), W209(K), W210(K), W215 (K), W220 (K), W230 (K), W463 (K), W639 (K) OBD/on bench ELV replacement

(Read/write/erase) W204, W207, W208, W210, W212, W169(NEC), W209(NEC), W211(NEC), W906(NEC), W209(Motorola), W211 (Motorola), W906(NEC), W639/2009-, W906(Motorola)

Guide to add 2012 Benz E350 W212 smart key by Autel IM508: Preparation: Car: Mercedes Benz E350 ESTATE W212 year 2012 Key: one original working key + one Xhorse BE key (FBS3 smart key)

Device: Autel MaxiIM IM508 with XP400 key programmer

Procedures: Connect Autel IM508 to the OBD port of vehicle via main cable Connect XP400 with IM508 via USB cable Check key frequency by VVDI Mini Key Tool

2012-Benz-E350-W212-Add-New-Smart-Key-by-Autel-IM508-4

Pull push start button out

2012-Benz-E350-W212-Add-New-Smart-Key-by-Autel-IM508-5

Enter MaxiIM IM508 tablet main menu Select IMMO-> Mercedes-Benz-> Automatic selection Readout car model and VIN number

Select 2010-2013-> Chassis 212-> Control unit-> Add key-> On vehicle

Follow the instruction to operate: Step 1: Read EIS data Step 2: Read ignition key information Step 3: Read blank key information Step 4: Obtain key password Step 5: Generate the key file Step 6: Test the new key In detail… Step 1: Read EIS data Detect frequency -Put the ignition key close to the programmer remote reception position and press any button of the key Step 2: Read ignition key information -Insert the ignition key into the IR keyhole on Autel XP400 key programmer

Confirm the key is smart key and continue The number of possible existing keys is shown below. Step 3: Read blank key information Check the frequency of blank key and insert into IR keyhole It will prompt “if there is a key password?” on the screen. -If you know password, press YES; -If you don’t know, press NO, then press OK to enter password calculation process Note: After the key password is calculated, it may be required to insert and remove the ignition key for multiple times before it can start the vehicle. Step 4: Obtain key password ->> 1.Insert the ignition key into the EIS and wait for 5s ->> 2.Pull the ignition key out ->> 3.Insert the ignition key into the EIS and wait for 2s ->> 4.After pulling the ignition key out, insert it into the IR ->> 5. Collecting data, calculating password (need 10-30 minutes) Get password successfully Insert the ignition key into the EIS and wait for 30s Hear steering lock sound Note: If it you cannot hear steering lock sound, must try to insert and remove. Ignition key must be personalized, if not will be not working. Password calculation completed! Step 5: Generate key file Insert the blank key into the IR keyhole on the XP400 programmer, and press “OK” Finish adding key Step 6: Test the new key ->> 1.Insert the new key into the EIS. -If the red indicator lamp on the key lights up and goes off, the key learning is successful. -If the red indicator lamp stays lit, try inserting and removing the key for several times. -If still not working, the key addition failed. ->>2.Turn ignition on and check if the vehicle can be started normally. -If the vehicle cannot start normally, the key addition failed Done!

dimanche, janvier 30 2022

Use a Laptop As an Automotive Scan Tool Instruction

Modern automobiles come equipped with an On-board Diagnostics system. OBD-II is an advanced management system that professionals and home mechanics can connect to via the diagnostic port. You can also use a computer or laptop instead of a handheld scanner, however, you will need a kit. Most laptop diagnostic software is more advanced than handheld scanners, offering the ability to monitor engine performance, as well as read trouble codes.

Step 1 Purchase a laptop OBD-II interface kit. You can purchase these kits at many automotive parts stores; in addition, they are available online. Step 2 Insert the software installation disc. Follow the prompts to complete the installation. If the installation does not automatically begin, access “My Computer” and double-click on the disc to start. Step 3 Connect the components to your laptop. Most kits contain a USB to serial adapter for laptops without serial ports. Once the device is attached to the laptop, connect the OBD-II diagnostic port cable. Step 4 Start the software program. Double-click on the desktop icon if the program did not automatically start. Get comfortable with the control interface. Step 5 Bring your laptop to your vehicle. Turn the ignition key to the “On” position, but do not crank the engine. Connect the Car Diagnostic Tools scan cable from the laptop to the diagnostic port on your vehicle, usually located in the driver’s side foot well, below the steering well. Click the “Scan” button on the control interface, if required. View the engine codes and diagnostic information provided by the program.

Launch X431 Perform ECU Backup Memory ClearInitialization

Launch X431 ECU backup memory clear function locates at TOYOTA diagnostic S.W–>ABS–>work support. TOYOTA-16 or CAN BUS connector is selected for the vehicle without CAN system, while CAN ABS II connector is selected for the vehicle with CAN system.

Launch X431 Toyota Related Topics:

Toyota Yaw Rate Acceleration Sensor and VSC Light Reset by Launch X431 Toyota Crown 2013 All Keys Lost & Remote Programming by Launch X431

More topics about Launch X431 check here: How to use Launch X431

The following is the operation procedure:

Background for back up memory: ABS ECU includes main control function, self-diagnosis function and fail-safe function. When a malfunction in the system is detected, A DTC will be stored into the back up memory, warning lamp light on and the system is deactivated by switch off fail-safe relay. In this case, ABS system will operates as general brake system. If the malfunction disappears, the ABS will be active again, although after the stored DTC is cleared, the ABS warning will not be off. At this time, mode change function will be performed to extinguish the warning lamp. The procedure of clear back up memory is easy:

Please select “Yes” in the Step 1/2 fig. to clear back up memory, then clicks “OK” in the Step 2/2 fig.

Notice: VSC/ABS/EBC warning lamp will come on after performing this function. It will not be off after the DTC is cleared, you should perform as following:

Mode Change procedure:

a)Please switch ignition key to OFF when warning lamp comes on;

b)Ignition on, then enter into X431� ABS �work support;

c)Select(click) MODE change menu

Select(click) NO to enter CHECK MODE;

d)At this time, ABS/VSC/ECB warning lamp will flash, if no flashing, please repeat above procedure until ABS/VSC/ECB warning lamp flashes from in 1Hz to in 4Hz.

<note> 1Hz = setting

e)The process will take about 1 minute less or more depending on vary vehicle.

f)To extinguish warning lamp, please operate X431 into general mode (or change into general mode automatically by switch ignition key to OFF).

Click “OK” to change into general mode:

samedi, décembre 18 2021

Autel MaxiVideo MV480 Digital Videoscope Unboxing Review

Autel MaxiVideo MV480, the next generation of digital videoscope, is ideal for inspecting difficult-to-reach areas with its semi-rigid flexible cable and 10-level adjustable LED light. It features dual front and side cameras with 1920×1080 high resolution, a 4.1″ 1200×720 full color LCD display, an 8.5mm camera probe, and a built-in 2600mAh battery with up to 4 hours continuous use. This multipurpose videoscope is an economical solution to inspect machinery, facilities, and infrastructure in the safest, quickest and most cost-effective manner possible. Autel-MaxiVideo-MV480-Digital-Videoscope-Unboxing-Review-1

Autel MaxiVideo MV480, the next generation of digital videoscope, is ideal for inspecting difficult-to-reach areas with its semi-rigid flexible cable and 10-level adjustable LED light.

Highlights: 1. High Resolution Images and Videos (1920 x 1080) 2. 4 Hours Working Time. Built-in 2600mAh battery with up to 4 hours continuous use 3. Support Multi-Language: English, Spanish, Portuguese, Italian, Duth, German, Polish, French, Janpanese, etc

Comparision of MV400 vs MV500 vs MV480 vs MV460 vs MV160 MaxiVideo

MV400 MaxiVideo

MV500 MaxiVideo

MV480 MaxiVideo

MV460 MaxiVideo

MV160 High resolution and full color digital LCD display 3.5″ (320×240) 5” (1280×720) 4.1″ (1200×720) 3.5” (640 x 480) Smartphone-based Record and play back high resolution still images and videos 640×480 1280×720 1920 x 1080 1920 x 1080 1920 x 1080 Wireless monitor enables remote viewing – √ – – – Touchscreen for convenient operation – √ – – – Single button for quick photo and video recording – – √ √ √ Add audio annotation for detail presentation – √ √ – √ On-screen photo editing and markup – √ – – √ Dual cameras see straight ahead or at a 90° angle – √ √ – – Digital zoom for detailed viewing 5× 5× 7× 7× 7× View objects as close as 1″ √ √ √ √ √ BOn-screen horizontal/vertical reverse √ √ √ √ √ On-screen 90° clockwise rotation – √ √ √ √ Built-in & adjustable LED illuminates viewing area √ √ √ √ √ HDMI port for monitor view – √ √ √ – Mini USB connector for uploading images and videos √ √ √ √ – 1 m long semi-rigid flexible watertight shaft √ √ √ √ √ Narrow probe diameter available in both 5.5 mm and 8.5 mm √ 8.5 mm 8.5mm (5.5mm Optional) 8.5mm (5.5mm Optional) 8.5mm (5.5mm Optional) Micro SD card slot for greater memory capacity √ √ √ √ – Oil and scratch resistant tempered glass lens √ √ √ √ √ Ergonomic and durable tool housing √ √ √ √ √ Built-in rechargeable Li-ion battery √ √ √ √ √ Multilingual support √ √ √ √ √ Water Resistant Camera head √ √ √ √ √

Features: 1. High resolution images and videos (1920 x 1080) 2. Dual front and side cameras for wider viewing angle 3. 4.1-inch full color LCD display (1200 x 720) 4. 1-button quick image capture and video recording 5. 70-degree field of view for expanded viewing angle 6. Adds audio annotation for detailed review 7. Micro HDMI-output enables streaming to larger monitors 8. Freeze-frame camera stills or video recording 9. On-screen horizontal/vertical reverse 10. Records and plays back images and video clips 11. 7X digital zoom for increased viewing 12. 8GB Micro SD card (included), supports up to 128GB 13. Mini-USB cable (included) for uploading images and videos 14. More than 10,000 lux, adjustable 10-level LED illumination 15. Flashlight for higher visibility in low-light environment 16. Built-in, rechargeable 2,600 mAh battery for 4 hours of continuous use 17. 1m (39.4″) semi-rigid, flexible watertight cable 18. Includes magnet and hook cable accessories 19. 8.5mm (0.33″) probe fits most spark plug holes 20. Compatible with 5.5mm (0.22″) camera head (not included)

Autel-MaxiVideo-MV480-Digital-Videoscope-Unboxing-Review-2

Product Display:

Autel-MaxiVideo-MV480-Digital-Videoscope-Unboxing-Review-2 Autel-MaxiVideo-MV480-Digital-Videoscope-Unboxing-Review-5

Package List:

1x MV480 main Unit 1x Magnet and Hook 1x Imager Heads and Cable (8.5 mm) 1x User Manual 1x Protective carrying case 1x Micro SD card 1x Charger 1x RS232 Serial Cable 1x Mini USB Cable

Autel-MaxiVideo-MV480-Digital-Videoscope-Unboxing-Review-6

- page 2 de 16 -